Click here to ask for a free demo


- After you've been trained and practiced
- After you (or/and your staff) have became comfortable using GEM-CAR
- After you've decided to officially start (GO LIVE) with GEM-CAR.
Step 1 – Gather the information
Have a list of all accounts with balances on hand. Information should include the customer numbers and total amounts due.Step 2 – Opening customer accounts
Make sure the customers with A/R exist in GEM-CAR, otherwise: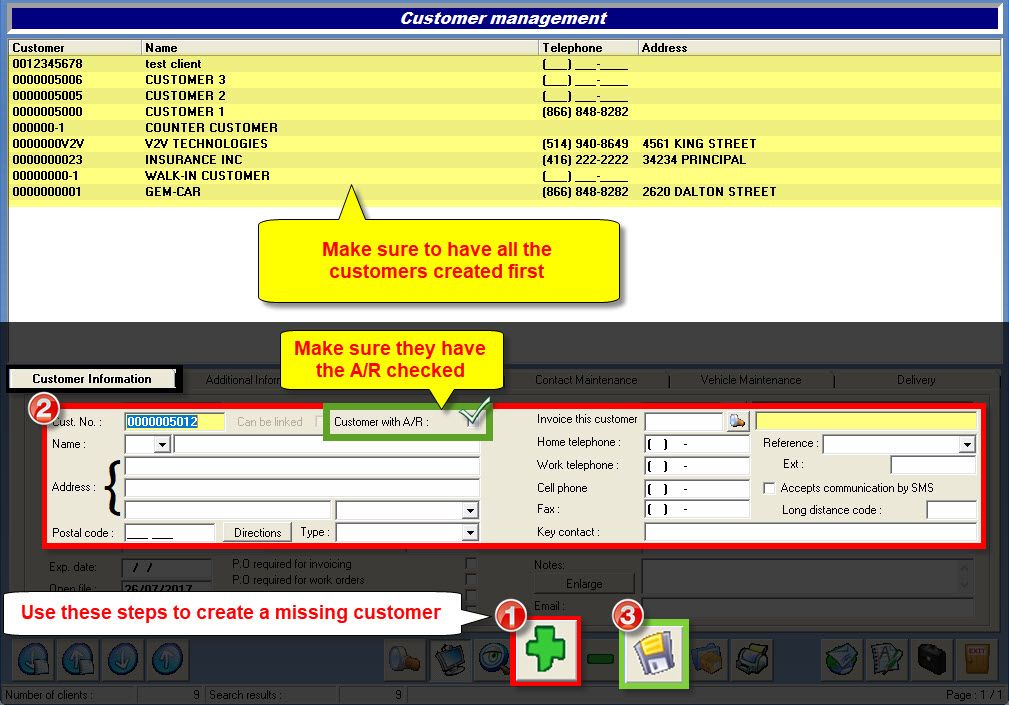
- Click the {fa-plus} to create a missing customer,
- Enter the customer information in the "Customer Information" tab,
- Make sure to check "Customer with A/R",
- Click the disk {fa-save} to save,
Step 3 – Invoice entries
From the main menu, go to Customer Management > Invoice entries: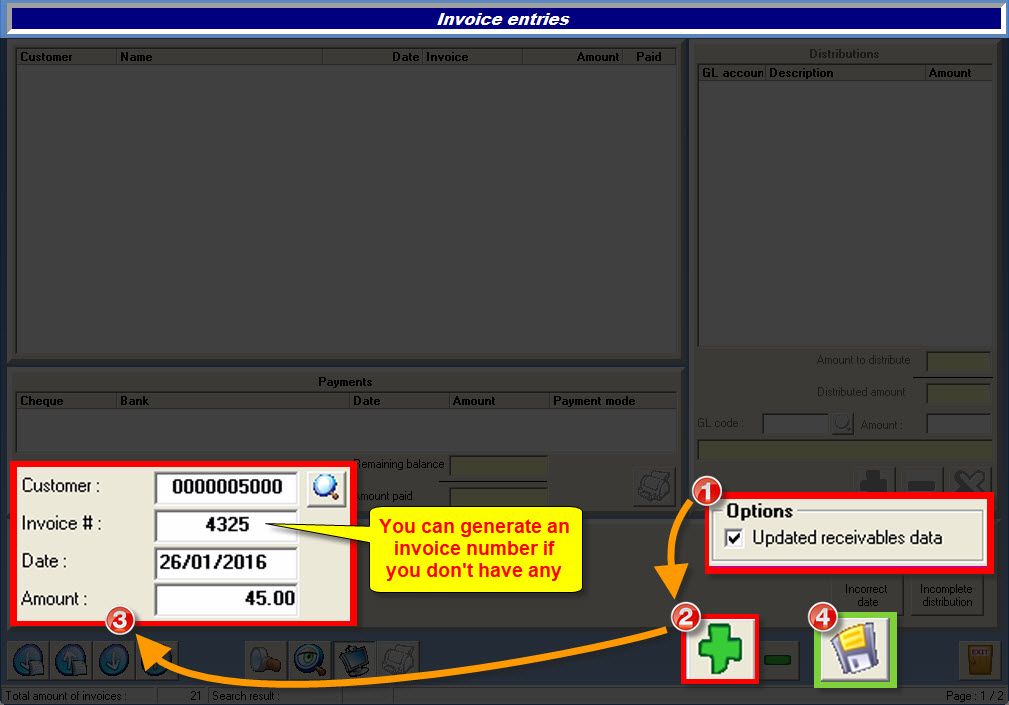
- (1) In the "Options" section, check the box:
- {fa-check-square-o } "Updated receivables data",
- (2) Click the {fa-plus} to add a receivable invoice,
- (3) Enter the invoice information:
- Enter a customer number,
- or click the {fa-search} to search and select a customer,
- Enter an invoice number.
- You can generate one if you don't have any (e.g.: BAL...),
- Enter a date,
- Enter the balance amount,
- Enter a customer number,
- (4) Click the disk {fa-save} to save.
{fa-warning} If you need to go back to a forgotten invoice, remember to check the "Payables entry to date". However, after you have started using GEM-CAR, you should never have to return to this window.
Step 4 – Validation
From the main menu, go to Customer Management > Reports: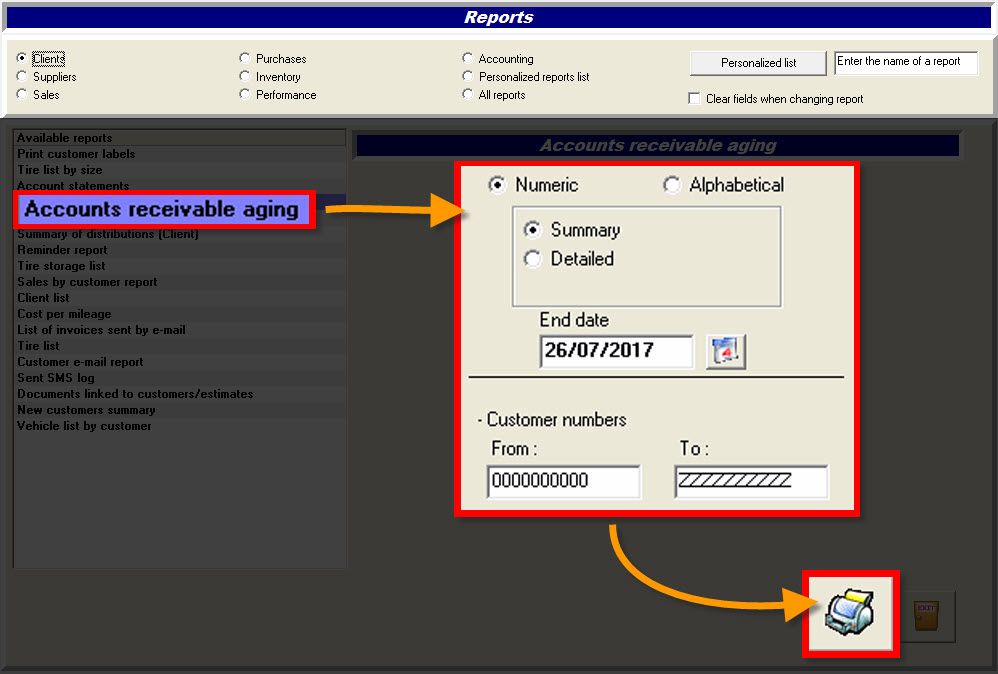
- From the Available reports in the left section, select "Account receivable aging",
- Select a sort order (Numeric or Alphabetical),
- Select a type (Summary or Detailed),
- Enter or select an End date,
- Enter a range of customers (All customers are included by default)
- Click the printer {fa-save} to display the report.